Production
7 Video Production Tips that Will Instantly Boost your Quality

Making videos that really stand out isn't just about having a good camera. It's about knowing the little tricks that professionals use to make their work look amazing. Think of it like cooking: anyone can follow a recipe, but a chef knows how to make each ingredient shine. This article will give you those "chef" secrets for video, focusing on how to make your videos look and sound truly professional, without getting too technical.
1. Light Like a Pro: Make Your Videos Look Like Movies
Good lighting can make a huge difference. Instead of just turning on a light, think about how light changes the mood of your video.
Mastering the Art of Three-Dimensional Lighting

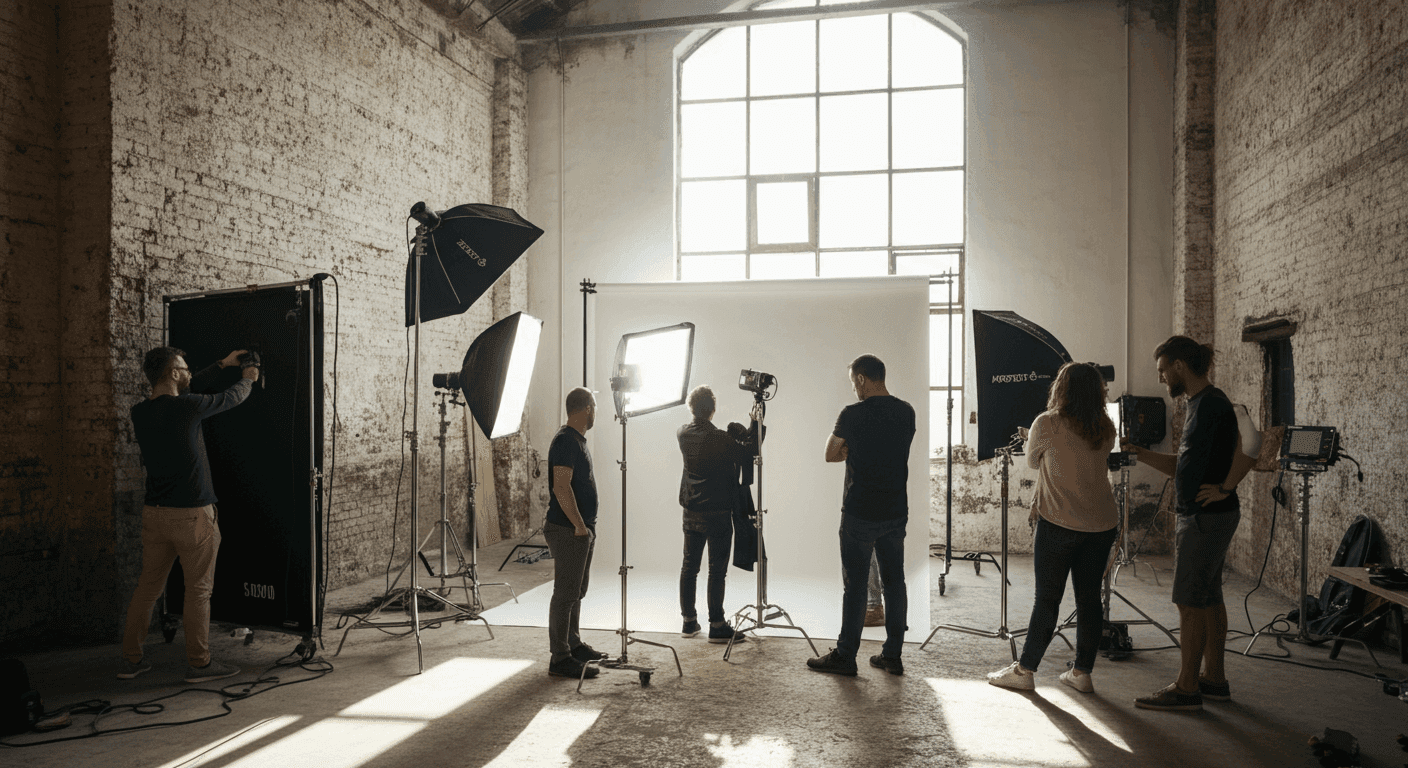
Professionals often use a three-point lighting setup: a key light, a fill light, and a back light. The key light is your main light source, providing the primary illumination. The fill light softens the shadows created by the key light, adding depth and dimension. The back light separates your subject from the background, creating a halo effect that makes them pop. Don't be afraid to experiment with the angles and intensity of each light to achieve the desired effect.
Harnessing the Power of Color Temperature
Light isn't just bright or dim; it also has a color temperature, measured in Kelvin. Warm light, around 2700K, has a yellowish hue and creates a cozy, inviting atmosphere. Cool light, around 5600K, has a bluish tint and feels more professional or clinical. Matching your light's color temperature to the scene's mood is crucial. For example, warm light is perfect for intimate interviews, while cool light works well for product demos.
Sculpting with Soft and Hard Light
Soft light, created by bouncing light off a surface or using a diffuser, minimizes shadows and creates a flattering, even illumination. Hard light, from a direct, undiffused source, creates stark contrasts and defined shadows, adding drama and depth. Understanding when to use each type of light is key. Soft light is ideal for beauty shots and interviews, while hard light is great for dramatic scenes and product shots.
Utilizing Natural Light Effectively
Don't underestimate the power of natural light. A window can be an excellent light source, providing soft, diffused illumination. Position your subject near a window and use reflectors to bounce light and fill in shadows. Avoid direct sunlight, as it can create harsh shadows and cause your subject to squint. Time of day also matters. Golden hour, the period shortly after sunrise or before sunset, provides warm, flattering light that can enhance any video.
Adding Visual Interest with Creative Lighting
Beyond traditional lighting setups, consider using colored LED lights to introduce color and visual interest to your background. You can use them to light your subject, or actually place them in the background of the shot. These can be used to create a modern, stylized look or to enhance the mood of a scene. Experiment with different colors and intensities to find what works best for your video.
2. Sound Real: Make Sure Your Audio Is Crystal Clear
People will forgive bad video, but they won't forgive bad sound. Clear audio is essential for professional-looking videos.
Investing in High-Quality Microphones
The microphone on your camera is often inadequate for professional-quality audio. Invest in a dedicated microphone, such as a shotgun microphone for capturing directional sound or a lavalier microphone for clear dialogue. Consider the environment you're recording in. Shotgun mics excel in controlled settings, while lavaliers are ideal for noisy environments or when your subject is moving.
Minimizing Background Noise and Echo
Background noise can be distracting and detract from your video's message. Find a quiet location to record, or use soundproofing materials to minimize unwanted noise. Echo can also be a problem, especially in large, empty rooms. Use acoustic treatment, such as foam panels or blankets, to absorb sound and reduce reverberation.
Monitoring Audio Levels for Consistency
Audio levels should be consistent throughout your video. Avoid sudden spikes or drops in volume. Use a VU meter or waveform display to monitor your audio levels and make adjustments as needed. Aim for a consistent level that is neither too loud nor too quiet.
Understanding Room Acoustics
The acoustics of the room you're recording in can significantly impact your audio quality. Hard surfaces, like walls and floors, reflect sound, creating echo and reverberation. Soft surfaces, like carpets and curtains, absorb sound, reducing echo and creating a more balanced sound. Experiment with different room setups and configurations to find the best acoustic environment for your recordings.
Enhancing Audio with Sound Effects
Don't underestimate the power of sound effects to elevate your video. Adding subtle sound effects in post-production can enhance the viewing experience and create a more immersive atmosphere. Consider using sound effects to emphasize actions, create tension, or add a layer of realism.
3. Steady Shots: Keep Your Camera Still
Shaky video can be distracting. Learn how to keep your camera steady for a polished look.
The Essential Tripod for Static Shots
A tripod is a fundamental tool for any videographer. It provides a stable platform for your camera, eliminating shake and allowing you to capture smooth, static shots. Choose a tripod that is sturdy and appropriate for the weight of your camera.
Utilizing Gimbals for Dynamic Movement
Gimbals are motorized stabilizers that keep your camera level and steady, even when you're moving. They're ideal for capturing smooth, cinematic shots while walking or running. Practice using your gimbal to master smooth pans, tilts, and tracking shots.
Leveraging In-Camera Stabilization and Post-Production Techniques
Many cameras have built-in image stabilization features that can help reduce shake. However, these features may not be enough for all situations. Post-production stabilization software, such as Adobe Premiere Pro's Warp Stabilizer, can help smooth out shaky footage. Be mindful of potential artifacts, like warping and motion blur, and use these tools judiciously.
Practical Stabilization Techniques for Any Situation
Even without specialized equipment, you can use practical techniques to stabilize your shots. Lean against a wall or other stable surface to minimize shake. Use your body as a natural stabilizer by keeping your elbows tucked in and your movements deliberate.
4. Frame It Right: Make Your Videos Look Well-Composed:
How you frame your shots can make a big difference in how your videos look.
Applying the Rule of Thirds for Balanced Compositions
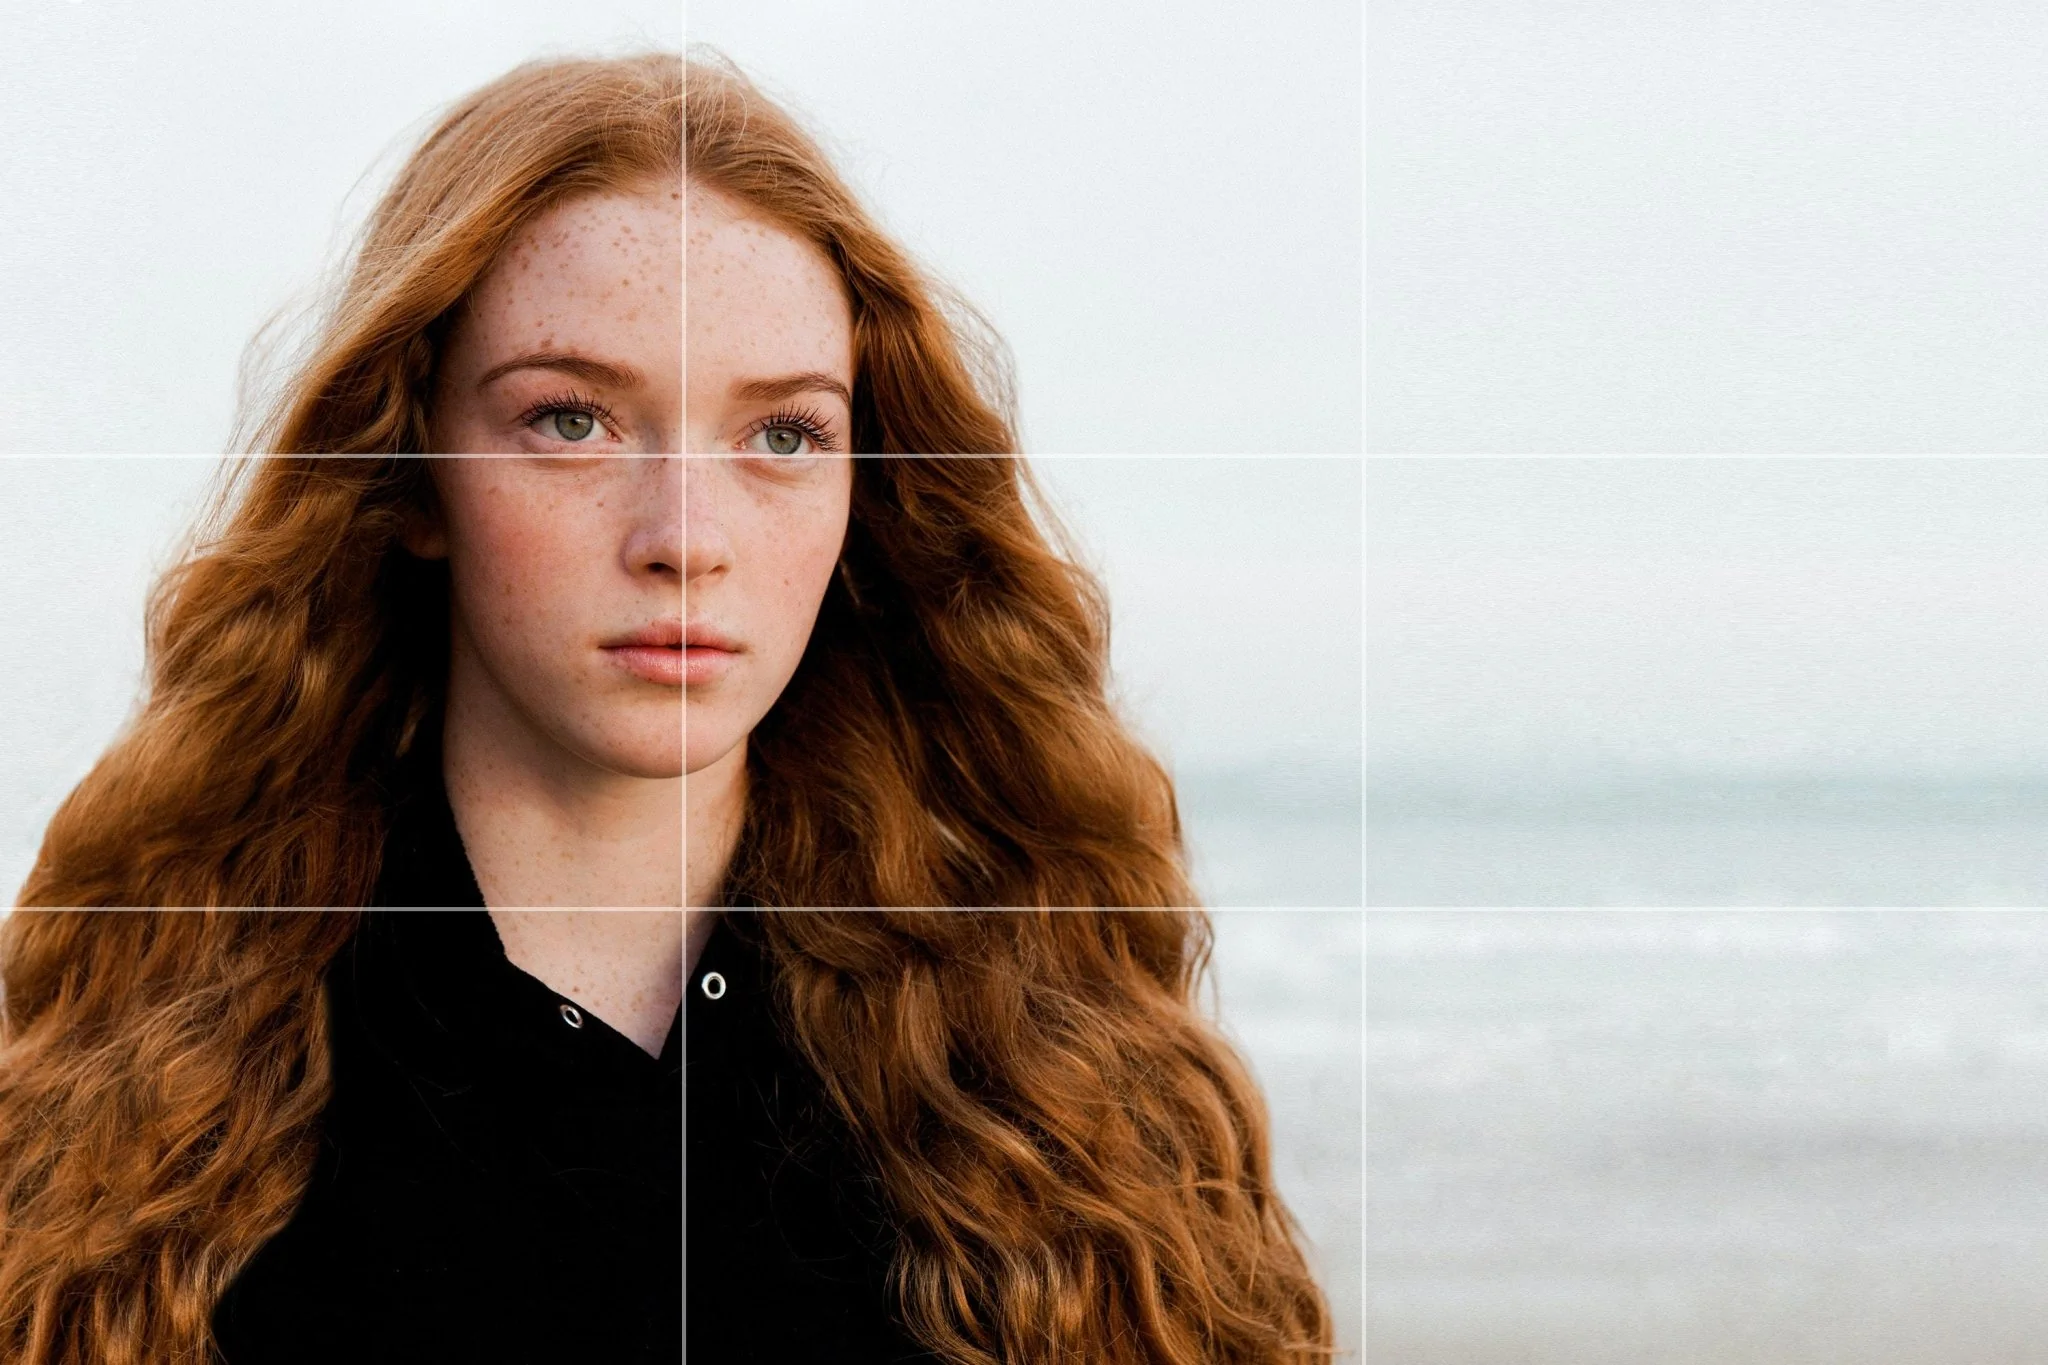
The rule of thirds is a basic composition guideline that suggests dividing your frame into nine equal parts and placing important elements at the intersections of these lines. This creates a visually balanced and engaging composition.
Creating Depth with Foreground, Middle Ground, and Background
Depth of field is the range of focus in your shot. By placing elements in the foreground, middle ground, and background, you can create a sense of depth and dimension. Use a shallow depth of field to draw attention to specific elements.
Guiding the Viewer's Eye with Leading Lines
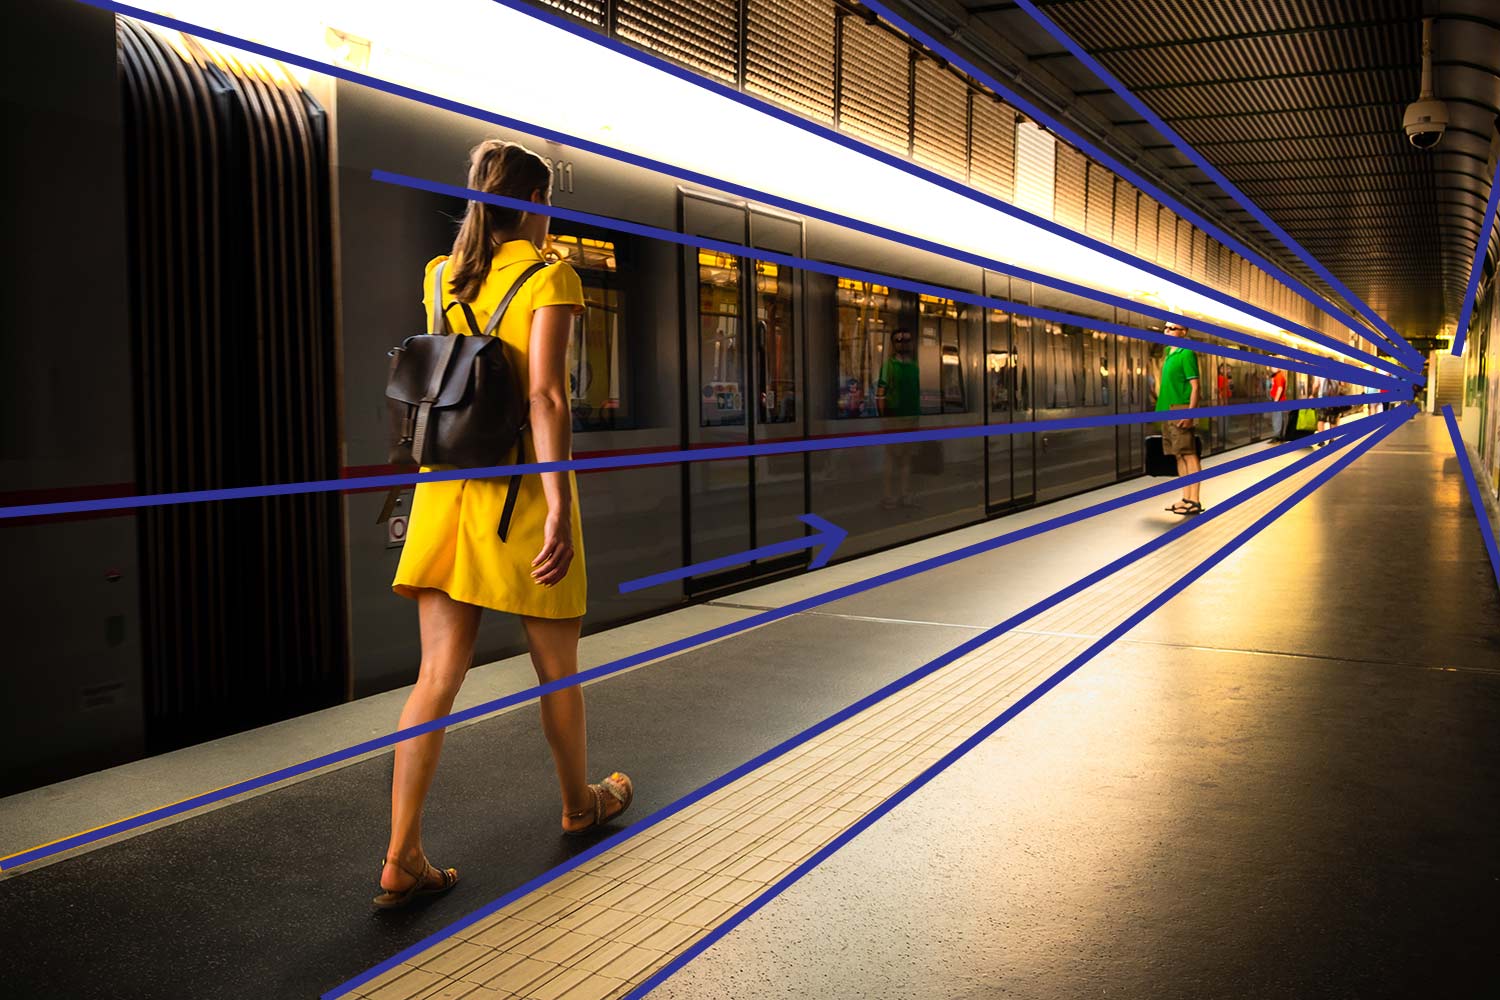
Leading lines are lines within your scene that guide the viewer's eye towards the subject. They can add depth and perspective to your shots. Use natural lines, such as roads, fences, or rivers, to create leading lines.
Utilizing Negative Space for Visual Impact
Negative space is the empty space around your subject. It can create a sense of balance and visual interest. Don't be afraid to leave some empty space in your frame.
The Power of Props
The props you use in your video can greatly enhance its visual appeal and storytelling. Choose props that are relevant to your subject and help to create a sense of authenticity. Consider the color, texture, and size of your props, and how they will look on camera. Make sure you balance them in your composition by using the tips below.
5. Editing for Impact: Style and Pacing
The way you edit your video can significantly impact its overall effect. Consider the pacing and style of your edit to create the desired mood and rhythm. Post-production is where all the magic comes together.
Pacing and Rhythm
A fast-paced edit with quick cuts can create a sense of energy and excitement, while a slower, more deliberate edit can convey a sense of calm or drama.
Editing Styles
Experiment with different editing styles, such as jump cuts, montages, or slow-motion, to add visual interest and enhance the storytelling.
Camera Movement and Storytelling
Use camera movements to guide the viewer's eye and create a sense of motion and dynamism. A smooth, flowing camera movement can create a sense of elegance, while a handheld, shaky camera can convey a sense of urgency or realism. Consider using techniques such as panning, tilting, tracking, and zooming to add visual interest and enhance the narrative.
Conclusion
Elevating your video production quality is a journey of continuous learning and refinement. By mastering the fundamentals of lighting, audio, stabilization, color grading and composition you can create videos that are not only visually appealing but also emotionally resonant. Remember that the key to success lies in consistent practice, experimentation, and a commitment to continuous improvement. Embrace the challenges, learn from your mistakes, and never stop striving to create videos that captivate and inspire your audience.
Key Takeaways:
Master three-dimensional lighting to create cinematic visuals.
Ensure crystal-clear audio by using quality microphones and minimizing background noise.
Achieve smooth, professional-looking footage with effective stabilization techniques.
Apply advanced composition techniques to create visually engaging shots.
Select props that enhance your video's visual appeal and storytelling.
Use editing techniques and camera movements to control the pacing and emotion of your video.

Recommended Reading